Many newbies to homemade Kefir face similar challenges and identical problems. If you are a beginner with Kefir, you could easily avoid many problems through the simple hints you will find on this page.
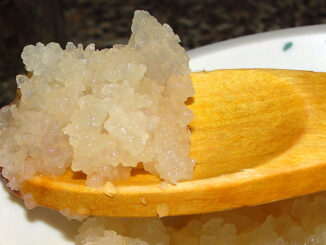
Milk Kefir grains are living microorganisms that need the same care and attention any other living creature needs. Like any other living creature, Kefir grains highly depend on the ambient temperature and the environment they live in.
Not surprisingly, most of the mistakes Kefir newbies make are related to the ambient temperature or the environment where Kefir grains grow and ferment.
So, here are the top 3 most common mistakes you might be making if your homemade Kefir doesn’t look or taste as expected.
1. Failing to account for Kefir grains’ growth
Kefir grains are, as we said, living creatures. When regularly fed, they grow and multiply.
Most Kefir beginners usually stick to the same amount of milk they used in their first batches. However, as Kefir grains grow with time, sooner or later, they turn to be too much for this same quantity of milk.
So, make sure you always keep the correct grains to milk ratio, which usually is two tablespoons of Kefir grains for each quart (about a liter) of milk. As your Kefir grains grow, either remove some of the excess grains or increase the quantity of milk.
Failing to do so may lead to accelerated fermentation and premature separation of Kefir or too strong Kefir with a yeasty smell. Or both …
2. Disregarding ambient temperature
All living creatures depend on ambient temperature, and Kefir grains are no exception. The fermentation time in any recipe you may find over the Internet is always based on a “normal” or “average” ambient temperature between 70 and 80 degrees F (21 and 26 degrees C).
Any deviation from these temperatures, perceived as “normal” or “average”, will result in speeding up or slowing down the fermentation process. As expected, on hot summer days, your Kefir will be ready considerably sooner than on cold winter days.
In hot summers, it is even advised to let your Kefir fully ferment in a refrigerator.
Fermenting Kefir in the fridge (or in another cooler place) is a reliable way to avoid too fast fermentation and separation of Kefir within only 5 or 6 hours. On the other hand, during winters, primary fermentation of Kefir may take even more than 24 hours, which is considered perfectly normal.
So, instead of sticking to the fermentation time per instruction, look and taste your Kefir mix periodically. Whenever your Kefir thickens enough, and you appreciate its taste, strain out the grains and stop the fermentation, regardless of the time elapsed. That’s especially valid for hot summer days when your Kefir may be fully fermented after less than 5 or 6 hours.
3. Failing to stir the Kefir mixture
In the ancient Caucasus, where Kefir originates from, people placed the leather bag with Kefir at the house’s entrance so that anyone passing by could shake it. In this way, Kefir was constantly mixed and kept in good shape.
During fermentation, Kefir grains usually float on the top of the mix. A part of them then enters into contact with air and dry out, forming the so-called “Kefir flowers”. Although “Kefir flowers” (also known as Mycodermia) are not molds and may not be harmful, they are definitely not a part of normal Kefir fermentation and should be avoided.
On the other hand, in extreme scorching and humid conditions, these dried parts may even form molds that could be toxic and dangerous for your health.
So, it is essential to periodically stir the Kefir mixture, ensuring that all grains constantly move and stay fully immersed in milk. In this way, you will not only ensure that no “Kefir flowers” or molds form on top of your brew, but your Kefir will be smoother, thicker, and more homogenous.


