There are numerous pieces of advice on how to make a thicker and creamier Kefir. Most of them really work and do not require additional resources to obtain a really better Kefir brew.
However, in our decades-long experience with Kefir, there is one single hint that appeared to be the easiest and the most reliable way to obtain a thicker, creamier, and tastier Kefir.
FERMENT YOUR MILK KEFIR MAINLY IN THE FRIDGE.
Right! It s as simple as that. Just do both the primary and the secondary fermentation of Kefir mainly in the refrigerator.
Why does fermenting in the fridge result in a thicker and smoother Kefir?
Good question! The reason is that low temperatures lead to slower fermentation and act in favor of bacteria’s development at the yeasts’ expense. As a result, slower fermentation gives Kefir a smoother consistency, and the predominance of bacteria over the yeasts makes Kefir thicker and tastier.
But still, there’s a catch! Don’t be tempted to ferment your Kefir in the refrigerator only, as this may have an adverse effect. Instead, kickstart the fermentation first at room temperatures, before moving the brew to the fridge.
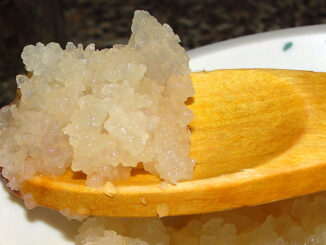
If you put your fresh Kefir brew directly into the fridge, fermentation may not start correctly. Remember that Kefir grains are a SCOBY or, a symbiotic culture of bacteria and yeast. This means that for the normal fermentation to start, both bacteria AND yeasts must have normal conditions to thrive. In other words, since Kefir grains are a mesophilic culture, they need normal room temperatures for their fermentation to initiate correctly.
How to best ferment milk Kefir?
So, in order to kickstart your Kefir’s fermentation, and then slow it down to get a thicker and tastier Kefir, follow these steps:
- First, let your fresh Kefir brew start fermenting for a couple of hours on the countertop, at room temperatures. In winter, this should normally take longer than in summer. More precisely, the initial fermentation kickstart could take about six to ten hours in winters, while on hot summer days this may only take about three to five hours. A good sign that the fermentation has already started is once Kefir stops behaving like fresh milk and starts thickening. By all means, do not allow Kefir to show any signs of separation. If that’s the case, you’ve gone too far.
- After the fermentation has started, move your Kefir brew to the fridge without removing the grains. This will be precisely the moment when the low temperatures in the fridge will start playing their important role. From this moment on you may start tasting your Kefir while periodically stirring it. Remember that periodically stirring your fermenting Kefir will not only make it smoother but will also improve its quality, since by stirring it you will allow more fresh milk to be in direct contact with the Kefir grains.
- Once your Kefir reaches the desired density and taste, you may sieve out the Kefir grains as you usually do, and return the brew to the fridge for the secondary fermentation. From this moment on you may start consuming your Kefir and enjoy its different tastes as time goes by. Sure, it all depends on each one’s individual taste, but in my opinion, Kefir gets best on the second day of its secondary fermentation. Still some “Kefir extremists” may find it best on the third or even fourth day, when Kefir gets really strong, quite sour, tangy, and slightly carbonated.
I sincerely hope this will help you make a thicker, smoother, and tastier Kefir. Happy fermenting!


