Milk kefir, a tangy, probiotic-rich fermented beverage, has been celebrated for centuries for its health benefits and unique flavor profile. Rich in beneficial bacteria and yeasts, it supports gut health, strengthens the immune system, and provides a plethora of nutrients. Crafting high-quality milk kefir at home allows you to tailor the process to your taste and nutritional needs. Here’s the ultimate guide to preparing top-notch milk kefir every time.
1. Understanding Milk Kefir
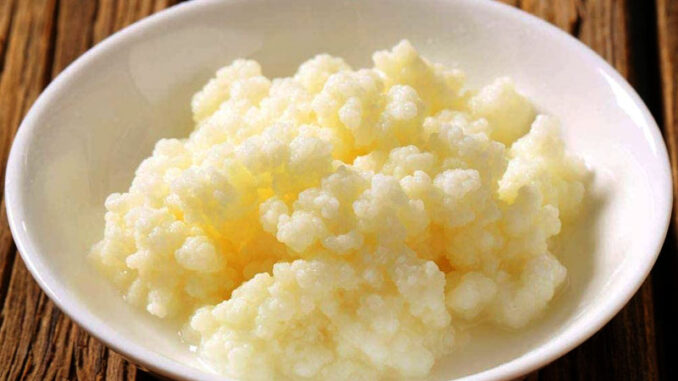
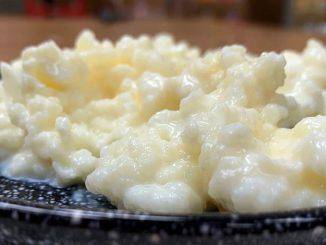
Milk kefir is made by fermenting milk with kefir grains, which are symbiotic colonies of bacteria and yeasts (SCOBY). These grains look like small, gelatinous cauliflower florets and act as the starter culture. During fermentation, the grains consume lactose (milk sugar) and produce lactic acid, carbon dioxide, and various bioactive compounds, resulting in a tangy, effervescent drink.
Key components of high-quality milk kefir include:
- Probiotic richness: A diverse range of beneficial microbes.
- Smooth texture: Creamy and slightly viscous.
- Balanced taste: Tangy with subtle sweetness and minimal bitterness.
2. Choosing the Right Ingredients
a. Kefir Grains
High-quality kefir grains are the cornerstone of excellent milk kefir. Look for grains that are:
- Plump, hydrated, and slightly translucent.
- Free from discoloration or off-smells.
- Sourced from a reputable supplier or an experienced kefir maker.
b. Milk
The type of milk you use significantly impacts the flavor and texture of the kefir.
- Dairy options: Whole cow’s milk is the most commonly used due to its creaminess and nutrient content. Goat’s milk offers a tangier flavor, while sheep’s milk results in thicker kefir.
- Pasteurization: Raw milk can yield richer flavors, but pasteurized milk is safer and more accessible for most people.
- Fat content: Whole milk produces creamier kefir, while skim milk yields a thinner consistency.
- Organic milk: Free of antibiotics and hormones, organic milk ensures a cleaner fermentation process.
3. Preparing Your Equipment
Proper equipment ensures a contamination-free environment for your kefir grains. You’ll need:
- A clean glass jar (quart-sized or larger).
- A non-metallic stirring utensil (wooden or plastic).
- A breathable cover, such as a coffee filter or muslin cloth, secured with a rubber band.
- A plastic or nylon strainer to separate grains from the finished kefir.
Avoid metal utensils and containers as they can react with the acids in kefir, potentially harming the grains.
4. Step-by-Step Preparation Process
Step 1: Hydrate and Activate the Grains (If Necessary)
If your kefir grains are dehydrated, rehydrate them before use:
- Place the grains in a small amount of milk.
- Let them sit at room temperature for 24-48 hours, changing the milk daily.
- Once the grains look plump and produce a mild, tangy aroma, they’re ready.
Step 2: Combine Milk and Grains
- Place 1-2 tablespoons of active kefir grains into a clean glass jar.
- Add 2-4 cups of milk (adjust according to the grain-to-milk ratio, approximately 1 tablespoon of grains per 2 cups of milk).
- Gently stir to evenly distribute the grains.
Step 3: Ferment
- Cover the jar with a breathable cloth and secure it.
- Let it sit at room temperature (68-78°F or 20-25°C) for 12-48 hours. The duration depends on:
- Temperature: Warmer environments speed up fermentation.
- Taste preference: Longer fermentation yields tangier kefir.
- Gently swirl the jar occasionally to ensure even fermentation.
Step 4: Strain and Store
- Using a non-metallic strainer, separate the grains from the fermented kefir.
- Transfer the finished kefir to a clean bottle or jar.
- Store in the refrigerator for up to a week. Refrigeration slows fermentation and allows flavors to mature.
Step 5: Repeat
- Return the kefir grains to a new batch of milk to start the process again.
5. Tips for Consistent Quality
a. Maintain Healthy Grains
- Feed your grains regularly: Grains thrive with fresh milk every 24-48 hours.
- Rinse grains occasionally in non-chlorinated water if they appear slimy or inactive.
b. Adjust Fermentation Conditions
- Experiment with fermentation time to achieve your desired taste and texture.
- Avoid extreme temperatures, as they can harm the grains or inhibit fermentation.
c. Monitor Taste and Texture
- High-quality kefir is tangy, slightly effervescent, and creamy. If it’s overly sour, grainy, or unpleasant, adjust your milk, grains, or fermentation time.
d. Rest Grains Periodically
If you need a break from kefir-making, store grains in milk in the refrigerator for up to a week or freeze them in a small amount of milk for longer-term storage.
6. Flavoring and Enhancing Your Kefir
Plain milk kefir is delicious on its own but also serves as a versatile base for various flavors. Here are some ideas:
a. Sweet Options
- Blend with fresh or frozen fruits (e.g., berries, mango, banana).
- Stir in honey, maple syrup, or agave nectar.
b. Savory Creations
- Add a pinch of sea salt and herbs like dill or chives.
- Use as a base for dressings or dips.
c. Spices and Superfoods
- Enhance with cinnamon, vanilla, or turmeric for added flavor and health benefits.
- Mix in chia seeds or ground flaxseed for extra fiber.
d. Second Fermentation
After straining the grains, let the kefir ferment for another 12-24 hours with flavorings like citrus zest, ginger, or dried fruit. This enhances complexity and reduces residual lactose.
7. Troubleshooting Common Issues
a. Overly Sour Kefir
- Shorten the fermentation time.
- Use cooler fermentation temperatures.
b. Separation (Curds and Whey)
- Stir the mixture gently during fermentation to prevent separation.
- Strain promptly once fermentation is complete.
c. Weak or Inactive Grains
- Ensure the grains are fed regularly and not exposed to harsh conditions.
- Try switching to a different type of milk if they seem sluggish.
8. The Benefits of Regular Milk Kefir Consumption
High-quality milk kefir offers numerous health benefits, including:
- Gut health: Supports digestion and nutrient absorption.
- Immune boost: Strengthens the immune system with beneficial microbes.
- Bone health: Provides calcium, magnesium, and vitamin K2.
- Improved digestion: Contains enzymes that help break down lactose, making it easier to digest for those with mild lactose intolerance.
9. Sustainability and Kefir Culture
Making milk kefir at home is not only cost-effective but also eco-friendly. By reusing your grains and opting for locally sourced, organic milk, you reduce waste and support sustainable practices.
10. Conclusion
Crafting high-quality milk kefir is an art that combines science, tradition, and personal preference. By selecting the best ingredients, maintaining healthy grains, and fine-tuning your process, you can enjoy a probiotic-rich beverage tailored to your taste and lifestyle. Whether you savor it plain or infused with creative flavors, milk kefir is a nourishing addition to your daily routine. Start your kefir journey today and reap the rewards of this ancient, healthful elixir.


