Can we just constantly keep on adding fresh milk to the Kefir brew while sieving out only the ready Kefir liquid? Yes, we can, and this is precisely what’s called “continuous fermentation”.
The two methods of fermentation
There are two distinct ways of fermentation – batch fermentation and continuous fermentation.
In batch fermentation, microorganisms are inoculated in a fixed volume of fermenting agent and nutrients. With microbial growth, the nutrients are gradually consumed and byproducts accumulate. At the end of the fermentation process, the ready fermented product and the fermenting agent are separated and removed, and the whole process is restarted.
Usually, each cycle of batch fermentation is followed by a thorough cleaning and sanitation of the fermentation vessels that enable the next fermentation cycle to be started “from ground zero”.
In the case of Kefir, we are talking about batch fermentation when the Kefir grains (either water or milk Kefir grains) are mixed with a specific quantity of nutrients (either milk or sweetened water), and once fermentation is finished, the fermentation agent and the ready product (Kefir drink) get separated and the whole process is restarted from the very beginning.
In continuous fermentation, another approach is applied. Fresh nutrients are continuously added to the fermentor, while the ready fermented product gets “harvested” at the same time. Usually, the addition of nutrients and removal of the fermented product is with the same volume, so the culture volume stays constant throughout the process.
In the case of Kefir, continuous fermentation is achieved by removing the ready product (the readily fermented Kefir drink) only partially and replacing it with the same quantity of fresh nutrients (fresh milk, for milk Kefir or sweetened water, for water Kefir).
With continuous fermentation of Kefir we actually never completely separate the Kefir grains from the fermented brew, but only partially sieve out the ready Kefir drink and replace it with the same quantity of fresh milk (or sweetened water, for water Kefir).
What are the advantages and disadvantages of both methods?
When compared to batch fermentation, the continuous fermentation of Kefir has many advantages and very few drawbacks.
Its main advantage is that it can be achieved in a much simpler way and it is easier to maintain. You only need to periodically (say once every 24 hours) drain out the readily fermented Kefir, replace it with the same or similar quantity of fresh milk (or sweetened water in the case of water Kefir), and stir well the new mixture.
With continuous fermentation, milk Kefir grains stay always covered with their protective layer of Kefiran and actually never enter in contact with either air or water.
You may be surprised that never rinsing the milk Kefir grains doesn’t hide any risk but in fact, this is an even better approach. With continuous fermentation Kefir grains form their perfectly balanced “living environment” that ensures a steady long-term quality of the final product – your tasty Kefir drink.
It is important for you to know that the batch fermentation method, where the liquid Kefir gets completely drained out of the Kefir grains and the grains usually get even rinsed with clear water (strongly disadvised!), seriously disrupts the “living environment” of the grains and with each brew, they need to adapt to their new environment.
With continuous fermentation, this disruption is almost completely avoided since the Kefir grains are constantly immersed in the steady environment they have created.
How to continuously ferment Kefir?
The good news is that continuous fermentation of Kefir is easier and simpler than batch fermentation.
Here are the simple steps to follow:
- Start by preparing your Kefir brew as usual.
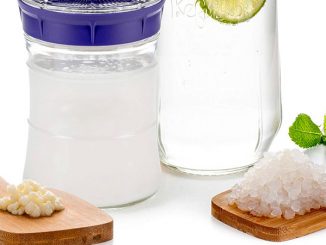
- When your Kefir is already fermented (after approximately 12 to 24 hours), drain out the fermented Kefir by leaving only enough liquid to completely cover your grains. A special Kefir fermenter or a Masontop Kefir Cap will come in handy.
- Note how much ready Kefir you have just drained out and replace it with the same quantity of fresh milk.
- Place your fermenter on the countertop for a new fermentation.
- Place the Kefir drink you just “harvested” in the fridge for a second ferment.
- Repeat the process the next day or so.
It is really that easy! Don’t forget however that the Kefir grains tend to expand and multiply with each brew. So, after a couple of continuous ferments either remove some of the Kefir grains or add more milk (or sweetened water for water Kefir) to keep the correct grains-to-milk (or grains-to-water) ratio.
Happy fermenting.